The 3 Options for IM Tooling: Prototype, Bridge, and Production Mold Builds
Injection molding is a common process for making plastic products in large volumes. Most people that are familiar with the subject know its capabilities.
Those same people also know another aspect of injection molding: the cost of building a mold.
The capital investment with building a new tool is a challenge for buyers and engineers. This investment checks out in the tens of thousands or even hundreds of thousands of dollars. A sum like this causes friction for launching new products to market, where the product has yet to be tested. Additionally, a project that is still testing the market won’t have a clear ROI forecast. Because of this, many teams are hesitant to invest in a tool without proof in the pudding.
Luckily, injection molders provide options for teams in different stages of their project. One of these options is to select a class of tools that matches your needs. For example, there are three types of tooling: prototype, bridge, and production. Each type of tooling has its benefits and disadvantages. But, each type will offer results at a reasonable price. Let’s jump into these tooling options further.
Prototype Tooling
Defining ‘prototype tool’
A prototype tool, also known as a Class 5 tool, is a low-volume run tool made for products that are in the development and testing stage. This class of tooling is great for testing a design’s functionality while staying flexible with design changes. Because of this, prototype tooling is a great starting place for rolling out new to market products.
Prototype tooling costs
The upfront investment in tooling is the biggest barrier to injection molding. Production-ready tooling is often too much for projects that are new and unproven. In comparison, prototype tooling is by far the lowest-cost option. Because of this, many companies choose to build a prototype tool first and then test their design. By doing this, companies will identify issues early and correct them on production-level tools. This will help cut costs at the earliest value stages of the project.
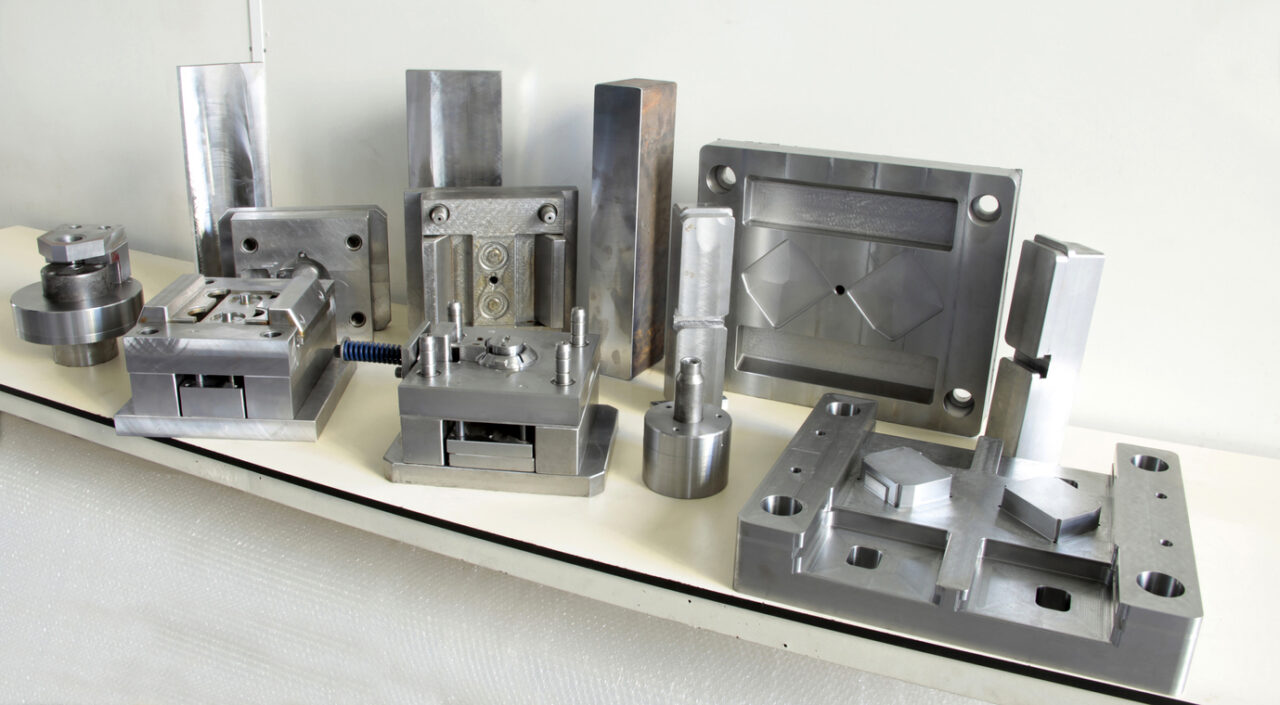
Types of Steel Used in Prototype Tooling
One of the key differences between tooling types is the kind of steel used in the mold build. When building the mold, a toolmaker can choose from a few different steel types. Each of those options will affect how long the tool lasts, how well it performs, how expensive it is, and what features the tool can use. Additionally, every type of steel has its own core properties. For a prototype tool, the mold base is made of low to mild-grade steel or aluminum.
Key Features of a Prototype Tool
Prototype tooling is a no-frill, but cost-effective way to get parts made and onto the market. Because of their simple configurations, a prototype tool uses cut-in-steel cores and cavities. This means that the toolmaker will cut the cavity/ core into the mold block itself instead of making interchangeable cavities. Additionally, class 5 tools will often opt out of expensive features: like complex cooling channels, runner systems, slides, and other features found on production tooling.
Takeaways from Prototype Tooling
+ Cost-effective
+ Great performance for the price
+ Standard textures and polishes
+ Great for testing features/ fit for applications
+ Flexible designs
+ Great for testing market demand and project ROI
– Low volume
– A short lifespan (>500shots)
– Minimal features
– Soft steel (easy to damage)
– Not weldable
Bridge Tooling
Bridge tooling is the intermediate step between prototype and production tooling. As the name suggests, this type of tool is a stopgap for products that have succeeded in their early stages. As a result, these products are ready for higher volume production. And with high volumes comes the need to upgrade your tooling.
However, bridge tooling is limited when compared to production tooling. For example, a bridge tool is not equipped with advanced features- like complex cooling channels. But, by choosing not to have these features you can cut significant costs. For this reason, bridge tooling is great for dialing in the process, calculating ROI on the project, and testing the market.
When should you use bridge tooling? And when is it appropriate to use full-production tooling? The answer to this depends on several factors. For instance, we look at the product’s application, the expected volumes, the material used, and more.
Mold Base and Tool Life
The steel used in a bridge tool is dependent on how many lifetime shots you expect to get out of the tool. For a Class 4 tool, the base can be made out of mild steel material. This will get you up to 100,000 shots/cycles. For a Class 3 tool, you will have to spend more to get hardened steel (minimum of 165 BNH). However, with this tool, you can expect to get 5 times the amount of shots (500,000).
Material Hardness (Resin Choice):
Material choice is an important factor in deciding what grade steel to use. For a bridge tool, a harder resin will wear the tool down faster. This will affect the life expectancy of the tool. Additionally, if the tool closes on a rigid plastic part, it could damage the mold. These damages aren’t dramatic, but the cost of maintenance and potential downtime increases.
Application- How it’s used:
The product’s environment and function influence the volume and material. First, if the parts are high in demand and replaced often, then you can expect high volume production. Second, if the parts are often exposed to harsh environments- chemicals, heat, etc… then you will need rigid material. With the combination of rigid material and high volume, it is best to consider hardened steel.
Production Tooling
Think you’re ready for production tooling? Great! There are many reasons to build a production-ready tool. One of the main reasons: dependability. A hardened steel tool is reliable and can make hundreds of thousands of parts. Thus, these tools make great ‘flagship products’- your main product offering.
Mold Base and Tool Life
Class 1 and Class 2 tooling are your best options for high-volume production runs. All Class 2 molding services (cavities and cores) are made of 280 BHN hardened stainless steel. Additionally, this steel is heat-treated to a minimum of 48 Rockwell “C”. This hardness allows the tool to last up to 1 MILLION cycles.
A Class 1 tool will get you into the multi-million cycle mark for extreme volume projects. This type of tool also has a minimum hardness of 280 BHN but is heat-treated to 48 Rockwell “C”.
Summary of choosing the right tool for your needs.
Ultimately, a high-end car is better than a low-end car, but there are reasons to hold off on the big price tag. The same applies to an injection molding tool. A production-capable tool may have all the bells and whistles. Yet, the cost of hardened steel and complex fixtures may surpass the needs of your project.
Ultimately, the type of tool you need depends on where you’re at in your project’s lifecycle. If you’re launching into a brand new project or one you haven’t tested the market for, build a bridge tool.
If the design you have may go through many revisions before it goes on the market, build a prototype tool.
If you have the next best product on the market, and you’re selling quantities of 500k or more, splurge on a production tool.