pexels-thisisengineering-3862615-1280x854.jpg

November 19, 2021by Chase Bodor

Most engineers approach risk management with a ho-hum attitude.

If you’re an engineer, then this probably isn’t your favorite task. For some, risk assessment is just a formality – a report passed around by different departments. So, you might take this routine easy, letting minor issues go untethered. This causes problems as those minor issues stack and becomes larger. As a result, the organization suffers a loss in both time and money.

Instead, you could avoid this with a well-executed risk assessment.

By addressing high-risk areas through a project’s lifecycle, you can save a company from disaster. This takes the hand of a seasoned engineer.

Are you about to launch a new injection molding project? Want to see how our team performs its risk assessments? Then buckle up! We’ll take you through our 9-Step Risk Assessment Process for assessing a new project request.


1: Part Design

For starters, most injection molded products follow a set of design rules. We call these Design for Manufacturing Principals or DFM. In essence, products that follow these guidelines are easy to produce and offer other molding benefits. This includes reduced scrap rate, less material use, and quicker production cycles.

The first thing we do is evaluate a drawing (or CAD) we receive for manufacturability. This process starts with looking at the product’s geometry. We do this to identify any details that are “difficult to mold”.

For example, wall thickness is one common design flaw we find in drawings. A thick wall can cause product deformation in the form of sink. And deformed products are destined to fail in the field, so we don’t want to encounter that issue!

Similarly, critical dimensions with tight tolerances are tricky. This is because of plastics’ ability to shrink. To clarify, as the product cools it shrinks based on the material’s properties. As a result, the product can shrink past the print’s callout. Of course, this is harder to avoid but doesn’t prevent us from making the product.

Instead, a subtle design change in the early stages will negate this issue before incurring avoidable costs. The result: good product with minimal engineering costs.

If you’re unsure about your part design, you can work directly with us to work out any questions you might have. Alternatively, you can look at conducting a mold flow analysis– a program that simulates how the design will fill in an injection molding environment.


2: Materials

Not everyone is an expert in material science, and you don’t need to be. But having a good understanding of the material you are working with goes a long way towards reducing your risk. You should identify whether the material you want to use is compatible with the application. Otherwise, the consequences of purchasing the “wrong material” can set your project back financially and timewise.

One of the obvious questions you should ask yourself is: “Does this material’s physical and chemical properties meet all my engineering requirements?” In other words, you’re asking yourself whether the material will work under the product’s normal operating environment. You can’t run plastic that has a low melting point in a high heat environment… It’s going to fail. But you already know that!

While that last example might be a no-brainer, some questions don’t come as easy. Here’s our top 3:

  1. Material Availability – What does the availability of this material look like? Supply chains are as fluid (and unpredictable) as ever these days. Also, some materials require a Minimum Order Quantity (MOQ) which can impact the cost.
  2. Process Compatibility – This comes into play with secondary processes such as over-molding or ultrasonic welding. Does the material you selected play well with others?
  3. Dimensional Stability – Does your product require tight tolerances? Well, a well-known quality of plastic is that it shrinks! The amount that plastics shrink varies between each material and each formulation. Just something to keep an eye on!

Ultimately, your best resource for plastic is a materials supplier. Our network of materials suppliers can offer design guides, datasheets, spec sheets, and more. We often involve these suppliers early in the process just so we have all the necessary information in hand and can eliminate potential risks.


3: Tooling

When looking at risk assessment for a new mold build, we exercise a lot of information from other areas that were covered in the previous sections. This includes part geometries, material selection, and labor usage (see automatic molds vs operator-required molds). The goal at this stage is to confirm that the mold’s capability matches the project’s requirements in terms of value, volume, and efficiency.

For instance, one way we facilitate harmony between reality and expectations is through production volume. If your annual production volume is less than 25k parts, then you’ll likely want a prototype quality tool. In contrast, if you’re looking at +1 million parts, you’ll want to upgrade into production tooling to avoid doubling down on your mold investment.

Another great point is building the mold with the right materials and features. When we talk about steel materials, we look at the chosen material’s physical and chemical properties. You don’t want a glass-filled material running thousands of shots in an aluminum mold because it will wear faster. With mold features, you can underestimate the labor cost of a mold with multiple hand loads and other manual-intensive features.

Plastics Plus manufactures all its tools to SPI specifications. And because any tooling built and retained is maintained at no cost to the customer, it is in both of our interests to conduct a full risk analysis and mitigate any risks before turning on the build.


4: Labor

Labor might not strike you as a risk factor. But the truth is – labor can be sneaky and costly when unaccounted for. There are a few circumstances where we try and address any labor risks, so let’s dive a bit deeper.

Part and Tool Design: good manufacturing design principles will tell you that fewer components in any given assembly are ideal for manufacturing. How does this relate to labor? Well first, more components will require more labor-intensive activity like degating, deburring, trimming, machining, welding, and more. This introduces the possibility of variation and mistakes in handling the product.

Then, we must consider the risk with the actual assembly of the product. The further along down the production lifecycle, the more valuable the product is and the more expensive it is to lose on defective parts. Ultimately, we look at the risk associated with performing the entire assembly along with the possibility of not having enough people to do them. This is especially an issue with the current labor shortage.

For tool design, we look at whether the tool is automatic or not. The question we ask is “does an operator need to stand in front of the machine to do XYZ”. If not, then the machine can run without operator supervision (aka does not use labor resources). If the mold has multiple features, like hand-loaded inserts, then that requires much more labor.

Physical Injury: Good Manufacturing Practices (GMPs) and OSHA standards cover most common workplace accidents, and we value injury prevention as much as any manufacturer. But as we mentioned above there are inherent injury risks present with labor. And the injury doesn’t always happen at work. An injury can occur on the factory floor, or it can occur outside of work during a pickup game at the YMCA. Either way, injuries are a risk we must consider as it contributes to a strained workforce.

*Just a note: we rotate positions on our production floor for this reason. It’s unlikely someone will sustain a serious injury, but it’s a risk that is still present.
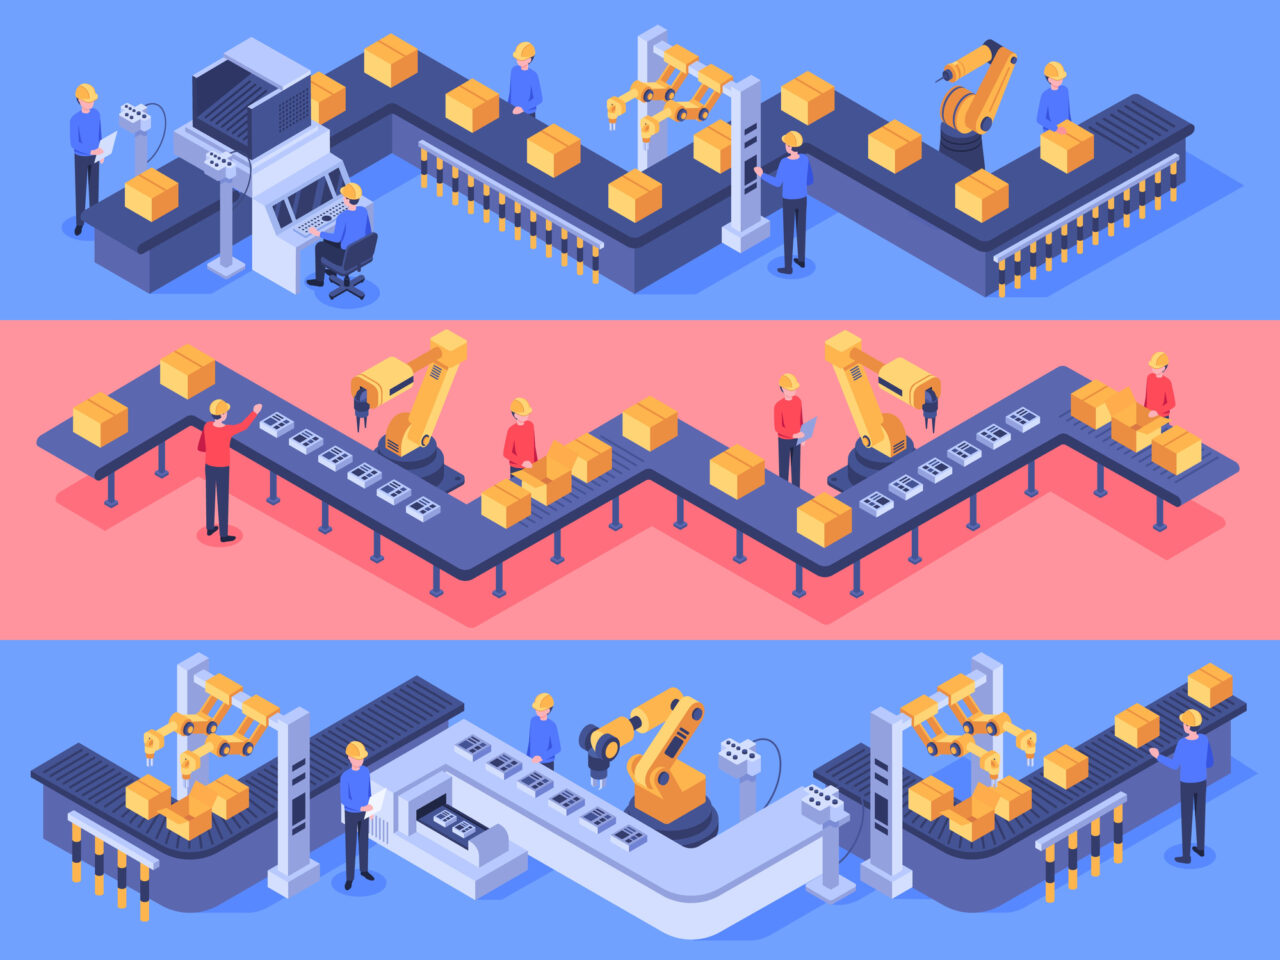
 

5: Equipment

Equipment failure isn’t something we run into often. However, the inherent risk with unplanned downtime due to equipment failure must be considered in the risk assessment. Unplanned downtime due to machine failure or mold damage happens for a few reasons: One – the equipment runs past its expected lifetime and requires repair or replacement. Two – the machine does not function as intended because of numerous factors. To prevent the latter, we test and validate our processing procedures to reduce human-caused errors. Furthermore, we keep a detailed maintenance database to check the pulse on all our equipment.

Another risk we consider is sourcing a new piece of equipment. For example, a new project might require a minor investment in equipment such as a fixture. Another might require us to buy an entirely new piece of production equipment like a heater or dryer. In either circumstance, we are at the mercy of our supplier. If the lead time on that equipment is extensive that poses a huge risk to the project’s timeline. Under those circumstances, the cost due to lost time can result in thousands of dollars. Therefore, we do our due diligence to ensure that we receive and can operate the required equipment for your project.


6: Packaging

By working with Plastics Plus, you have the option to produce a finished, packaged product. In other words, your product can be molded, assembled, and packaged all under our roof and shipped to you ready for market. This is a great advantage for you as the product owner, but it doesn’t come without risk.

The risk in packaging is a combination of a few other risk areas that we’ve covered in this article. For example, let us examine the packaging equipment. A complex packaging machine can do a few things at once: unroll, print, open (with air), and seal the package within a single cycle. Any variation in this process will impact the quality of the packaging and potentially the product. And any machine failure will result in unplanned downtime. In either case, the result is a loss of time and money.

Now let’s look at this from a materials standpoint. As with most supply chain constraints, not being able to source the packaging is the primary risk. The secondary risk is sourcing poor-quality packaging that doesn’t meet either of our standards. If we added a third risk, it would be scrapped packaging. All three of these situations pose a risk to our operations. But more importantly, it poses a risk to your bottom line which is what we are aiming to improve in the first place. Before we jump into one more area of packaging risk, we should remind you that our quality system is designed to prevent the poor product from ever reaching your doorstep. Thus, you can be confident will address any major concerns upfront.

No one likes to be blindsided by poor foresight.

Since we mentioned shipping to your doorstep, we should address the risk with shipping products. When we ship products via courier there are a few things that can happen. For instance, products on long-hauls can be damaged on their route because of poor handling. Nevertheless, we contract with major courier services to ensure that a professional is handling the product. Ultimately, the risk here is minimal but needs to be considered as part of our process.


7: Application

Application, or the end-use of the product, is one of the most important portions of our risk assessment process. We need to collect as much information on the use of the product and the environment as possible. During our initial conversations, we will expect to learn exactly who the end-user is and what the impact of the product is. Furthermore, we will want to identify the level of safety (or danger) for the user. On a similar note, we will consider whether the product is fit to function in its intended application.

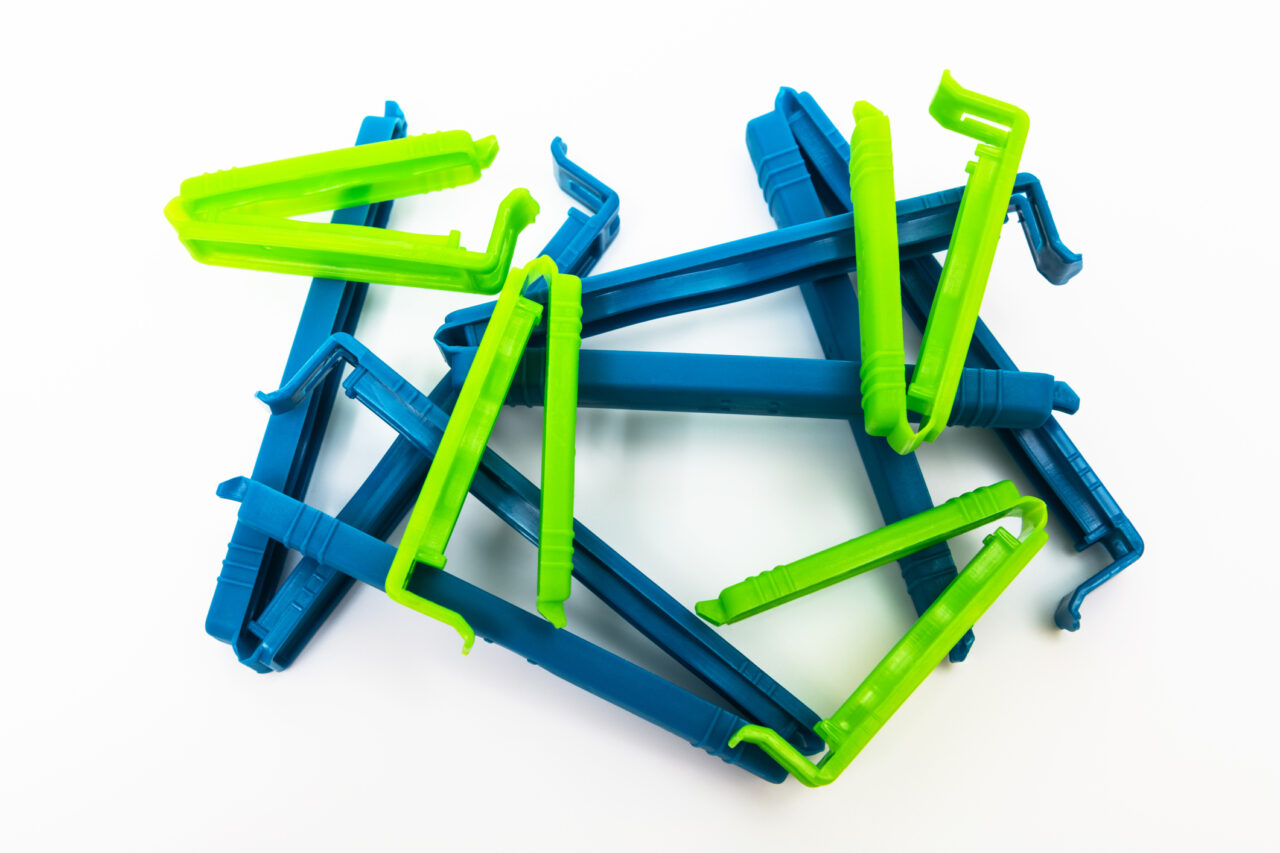
For example, products that come into direct contact with a medical patient (such as a cannula) carry a higher risk factor than a plastic clip. Similarly, if the component is critical to the operation of an assembly or device (such as a CPAP) then the risk is also high.

Comparatively, if the product does not interface with the user and has low criticality then the risk factor is lower. Nevertheless, we still evaluate whether the product can be successful in its normal operating environment. Just because the risk for injury or death is low, we still want to prevent product failures. In this case, we’ll look at the fit and function of the part from an engineering and materials standpoint to identify any red flags. Ultimately, it is your job to determine whether the product is fit for purpose.

For review, we covered three application risks in this section:

  1. Risk to the user
  2. Risk of criticality
  3. Risk of fit for purpose

Next, we’ll cover risks associated with compliance and quality requirements.


8: Regulatory Compliance

Regulatory compliance isn’t necessarily a risky undertaking for most projects. FDA compliance, GMPs, and other regulatory/ statutory requirements are handled primarily on your end. But we often abide by the same requirements to give our customers a seamless experience. However, these requirements prove to be more stringent for some products than others. Some of these falls outside of our capabilities, namely controlled molding environments and ISO-certified clean rooms. Under those circumstances, we avoid risk by turning the project away. On the other hand, we assess projects within our capabilities and determine the risk of falling out of compliance. All things considered, our quality department ensures that our party abides by all requirements laid out by you, the customer.


9: Special Quality Requirements

Validation is a staple in any robust Quality Management System (QMS). This is a multi-step, cross-departmental function in most manufacturing companies. It proves the capability of the methods machinery used to produce, measure, and test the manufacturing outcomes. In other words, the quality requirements set forth by the customer are fulfilled through validation procedures.

When we consider the risk inherent in those quality requirements, we look at the capabilities of our staff, equipment, and processes. These risks are like those present with regulatory compliance in that every product is a bit different. The first thing to consider is whether we can meet the proposed quality requirements. Some products carry tight tolerances in their drawings, critical dimensions that are unavoidable. Although we specialize in close-tolerance injection molding, we encounter some dimensions that are outside our capabilities. Once we establish competency to meet those requirements then we show our proof in the pudding. Explicitly, we’ll run our tests (IQ, OQ, PQ) and conduct others as required (PPAP, MSA, DOE, etc.).

If you want more information about our quality procedures, you can follow the link here.


Conclusion

By now, you should have a grasp of all the elements of proper risk assessment. Congratulations! You’re on your way towards approaching risk like a seasoned pro.

Good luck with your next project! Contact us if you need help conducting a full risk assessment on your next injection molding project.

Want more engineering tips? Follow our newsletter by clicking the link here and get tips from our engineers delivered straight to your inbox.


iStock-1297924649-1280x853.jpg

August 31, 2021by Chase Bodor

Introduction to Plastic Living Hinges:


A plastic living hinge is a part design feature that uses a thin plastic material to join two larger plastic bodies of the same material. In other words, a living hinge is an extension of the common material between the two plastic parts. These types of hinges are common features in product design for several reasons. For instance, they are easy to manufacture, reduce production costs, and improve the end-user experience. Take this for example:

Remember when you had to unscrew the cap on the ketchup bottle before you doused your hot dog in tomato goodness? 

With plastic hinges, the condiment bottle manufacturers removed a simple inconvenience.  They replaced the screw top with the easy-to-use, pop-off white caps we know today. A feat in mechanical engineering if you ask me. Yet, this was not the only way living hinges revolutionized plastic products. There are more examples that span over many different industry segments. We’ll get to those shortly.

In this article, you’ll learn what a living hinge is and how it is produced in a manufacturing environment. Also, we’ll highlight the features and benefits of using them in your part design. Our process involves using thermoplastic materials, the main ones being polypropylene and polyethylene. By the end of the article, you should have everything you need to design a living hinge for your next project.


What is a Living Hinge?


The definition of a living hinge is a thin section of plastic that connects two large plastic pieces. In our ketchup cap example, this would be the base of the cap and the lid. The two of which are joined by a thin and flexible plastic- the hinge. In this case, the cap uses what is called a butterfly hinge. There are four types of living hinges that we’ll talk about later in the post.


What are living hinges used for?


Living hinges allow for the two aforementioned plastics pieces to rotate along a thin hinge line. This gives the part greater rotational mobility –  usually 180 degrees or more. This mobility is one of the prime reasons why designers love to use living hinges. For instance, some applications are designed around rotational mobility being the core feature because it makes the product easier to use. Ultimately, this improves the overall product’s look, usability, and function.

Aside from improved usability, a living hinge also requires fewer manufactured components. For example, a container that uses two-piece hinges requires multiple parts for the hinge to work. Unlike the traditional hinge, the living hinge is an extension of the container itself. The result – a living hinge has fewer parts to assemble and simpler tooling requirements. These two factors eat up a large chunk of the manufacturing costs. Overall, using a living hinge design has three key features:

To summarize, the main reasons that living hinges are used for are:

  1. Improving a design
  2. Reducing manufacturing costs
  3. Giving the user a better experience with the product


Why should I consider a living hinge for my part?


If you’re thinking about using a living hinge versus a traditional hinge there are a few things you need to consider. One thing is how much the design affects your manufacturing costs and process. If your product is compatible with a living hinge design, then you might be able to save some money. However, the opposite is true that a poorly designed hinge will lead to more manufacturing costs down the line.

Another consideration for living hinges is how it will affect your customers. A well-designed living hinge can change the way customers view and use your product. However if the design doesn’t make the product easier to use, more affordable, or look better, then it is best left alone. Ultimately, you should consider a living hinge if you believe it will improve how customers view and use your product. 

Now, let’s talk about the benefits of a living hinge design versus other hinges.


The Benefits of a Living Hinge Design vs Traditional Hinges


There are three main benefits from using a living hinge design:

  1. Less manufacturing costs – In most cases, a living hinge is less costly than its traditional counterparts. In the context of injection molding, a traditional hinge would require cutting another cavity into the mold plate. In other words, you would have to make accommodations for an additional component for both manufacturing and assembly. On the other hand, you might even cut a check for an entirely separate tool to produce just the hinge(s). This will quickly add to your piece part price even if the tool build is simple. With the living hinge, the entire “assembly” can be made using one to two cavities, so no extra costs. Your tooling cost would be less expensive because you would also eliminate an assembly step.
  2. Better user experience– How a customer experiences your product is every bit as important as how it’s made. We’ve discussed the consequences of a poor design, but what about a good design? There are many opportunities where a well-designed living hinge can change the way customers view a product. The ketchup bottle cap was an obvious one because it changed the way manufacturers made condiment bottles. Now, Heinz was already a market leader in this category. But a design like that could help a lesser-known company become a fan favorite!
  3. Durability and flexibility– We’ve talked about the ketchup bottle cap many times now- Are you worn out from it? Well, the cap is still going strong, bending at the hinge with exceptional rotational mobility. And that’s exactly what it’s made for! A living hinge has an incredible lifespan even after it’s activated millions of times.

Now that we’ve gone over some of the main reasons why designers use living hinges, we’ll start talking about the characteristics that make these designs so adaptable.


What Are the Characteristics of a Living Hinge?


Performance characteristics

  • Application – Living hinges by nature are adaptable to many designs that utilize a hinge. This is especially useful in prototyping, where you might be testing different hinge designs.
  • Visual – The properties of their parent material – polypropylene – allows living hinges to have a smooth and clean look. You’ve probably seen the many colors of bottles down the shampoo aisle at the store, so almost any color is achievable.
  • Chemical Resistance– Although polypropylene has less chemical resistance than other plastics, a plastic living hinge is more resistant than metal or ceramic. However, below-freezing temperatures (32F) could cause the hinge to become brittle. 
  • Durability – Durability is not an issue for this type of design. 
  • Flexibility – As explained before, the 180-degree rotational flexibility of the hinge is one of the main reasons it is successfully deployed.
  • Friction Reducing – When the pivot or hinge line involves two or more pieces there is more friction between the two parts. But with a living hinge, the friction is all but eliminated.

While this list characterizes living hinges in a general sense, there are different designs that each offer a certain advantage. Let’s talk about those different designs in this next section.


Types of living hinges


Straight/ Flat living hinge – A straight hinge is a single or series of hinges that fall along a single axis. There are two types of flat hinges:

    1. Long continuous– These are common with plastic containers- like pencil boxes and clamshell containers. In this case, the hinge connects two long plastic pieces using a single long hinge line. 
  • Short continuous- The short continuous hinge is common to shampoo bottles. This hinge is shorter and uses what’s called a plastic stop- a piece of plastic that stops the hinge’s rotation at 180 degrees.

Butterfly living hinge – Snip, snap! The butterfly hinge design allows for snappy lid opening and closing. However, because this design has a spring-like function there is a limited range of motion. For example, the lid can only flip to the 90 degrees or 180-degree position depending on the design. 

Double living hinge- Now this is unique, a double living hinge! These designs create a gap between the two plastic bodies using two straight hinges separated by a narrow open section. Not to mention this also allows the hinge to rotate a full 360-degrees. A good example of this is an old CD case.

Bi-stable living hinge – A bi-stable living hinge uses three separate hinge sections to perform strong open and closing action. This is very similar to the short continuous flat hinge, except with more hinge. In other words, the bi-stable hinge is stable (or a firm) in both open and closed positions.

Now that you know there are different options for designs, your next question is probably- How are living hinges made? In the next section, we’ll go deeper into the manufacturing techniques used to make a living hinge. Keep in mind, we’ll be focusing on plastic manufacturing.


Manufacturing Techniques To Create Living Hinges


Subtractive manufacturing- CNC Machining

In the prototyping stage, there is no better way to test a design than CNC machining. With a CNC you can machine the plastic down to a couple of thousandths (of an inch) on the hinge. However, polypropylene is notorious for being stubborn and might produce some rough edges. For this reason, you would need to switch to the next manufacturing method when you’re ready for production.


Injection Molding 

Injection molding is our bread and butter at PPT, which is why we know how to make living hinges this way. For one, this method is easily the most cost-effective and will produce parts at the highest rate. Second, injection molding produces the most consistency in terms of quality and variation. Therefore, once you nail down your design for manufacturability you can produce consistent parts at a fast clip.


Additive Manufacturing – 3D Printing

3D printing is another popular prototyping method that designers use. In fact, 3D printing allows you to see how a design functions before ever going into production. With this in mind, you can test and adjust your design without sinking thousands of dollars in tooling. The downside to 3D printing is its limited production capability. This is where injection molding comes into play for the long run.


Types of Injection Molding Materials Used For Living Hinges

  • Polypropylene (best): Polypropylene (PPE) is a soft, flexible plastic that is best suited for this type of application. This material’s properties allow for that true rotational mobility of 180 degrees. And the material is flexible enough that it won’t snap, crack, or rip at the hinge line. Ultimately, this is the material you’ll want to stick with or change to if you want to design a living hinge. 
  • Polyethylene: Polyethylene is also a good material to work with. Here, you have one main option: High-density (HDPE) material. The high-density material is thick but easier to machine on a CNC. Furthermore, the hinge line can be made thinner to allow for increased rotational mobility. 


Conclusion

 In summary, a living hinge is a quality design that can improve the usability and flexibility of your product. And you will benefit from lower manufacturing costs and deal with fewer assembly parts. If you’re curious about how a living hinge design works, or you have a design of your own you would like us to manufacture, give us a call! We’ll help you get up and running in the presses in no time.


iStock-1168569710-1280x960.jpg

May 19, 2021by Chase Bodor

What is the question burning in the back of the mind of manufacturers today? The same as it’s been for decades – how do I reduce my costs and increase productivity? With the mix of labor force struggles, high demand for products, and strained supply chains, maximizing efficiency is more important than ever. That is because time is a limited resource and already spread thin in most factories. So, how can we maximize our use of time to bring costs down and produce more? One way is to design an efficient assembly process with a one-piece flow.

In this post, we will introduce the concept of one-piece flow assembly lines. We will discuss why this process is more efficient compared to other assembly processes. For example, we will focus on the difference between batching and one-piece flow. Additionally, we will link to a video that illustrates how much time you can save with this process.

Ready. Set. Assemble!


What is One-Piece Flow?

Flow is the movement of a product from one operation to the next in a value stream. With a one-piece flow, the goal is to plan the workflow based on the products’ needs while eliminating wasted movements. In other words, with the one-piece flow, you want to cut touches that interrupt workflow and that aren’t value-added. Ultimately, this allows you to move between operations without work-in-process (WIP) between them.

To demonstrate, some real-world examples of continuous flow are flowing water and wind. These two elements flow continuously until they are restricted by obstacles (rocks, trees, structures), constricting their flow. Below is an illustration of this happening in nature.

As you can see from the illustration, the canoes can travel down the river with ease when there aren’t any obstacles. When we introduce objects that interrupt that flow our adventurers have a much harder time traveling downstream.

Continuous flow in natureThis is a canoe on a river with interrupted flow

Bottlenecks: 

On the production line, this creates what we know as a bottleneck. A bottleneck is a process in an assembly line with limited capacity that affects the capacity of the entire line. In other words, a bottleneck constraint occurs when there is too much work/ supply at a specific point in a process. Ultimately, a bottleneck holds up the rest of the operation up and down the value stream. This results in longer delays and higher production costs.


Where Did One-Piece Flow Originate?

Single-piece flow comes from the lean manufacturing practice of just-in-time (JIT). The well-known car manufacturer- Toyota -pioneered this idea in the mid 20th century. With just-in-time, manufacturers produced components only as needed and nothing more. In other words, with a one-piece flow, the manufacturer delivered a product only when the customer demanded one. 

This lean system resulted in many manufacturing revelations. For one, it helped standardize many processes and workflows. But more importantly, one-piece flow helped cut inventory build-up and cost. Because of this, manufacturers were able to fill orders at the rate of customer demand without having to back stock pallets of products. All in all, by optimizing their workflow manufactures reduced their inventory cost, used time and resources more efficiently, and increased their output.


Why is One-Piece Flow Better Than Batching?

Batching is the process of finishing one operation for a whole batch of pieces before moving on to the next step. For example, for a batch of 10 parts, an operator would complete step 1 for all 10 parts before moving onto the next step. Most of those unfamiliar with lean manufacturing would accept this as common sense and run with it. Some would even argue that it is an efficient method. 

Not so fast! 

What happens with batch processing is this massive pile-up of inventory between each station. We know this as work-in-process (WIP). And when there is WIP someone is waiting for that process to finish. That someone could be the next person on the line, or a customer waiting for their product.

Waiting time = wasted time.

Check out this illustration showing the time-saving between one-piece vs batch processing:

Batch Processing Single-piece flow graphics

 In this example, when we use single piece flow we reduce the assembly time by 40%! 


Let’s break down what we are seeing above in batch processing:

Operator 1 (Blue) has to complete Step 1 for all 10 parts in the batch. She then passes all 10 pieces to the next operator.

Operator 2 (Orange) gets her hands on the batch after patiently waiting. Now, she must complete Step 2 for all 10 pieces. There are now 10 parts that are WIP. * Side note- If this operation were to continue past these 10 parts there would actually be 20 parts in WIP and 30 in the next step.

Finally, Operator 3 (Green) initiates Step 3. After the first 60 second cycle, we finally have 1 finished good. But, it has taken us 21 minutes to complete just 1 part! At the end of this operation, they will have spent 30 minutes on these 10 parts.


Now, let’s move over to the single-piece processing graphic:

Operator 1 (Blue) takes one piece and completes step 1 in 60 seconds. She moves the finished part to the next operator and grabs a new part. She’s moving fast!

Operator 2 (Orange) ‘pulls’ the first part to her station and finishes her step in 60 seconds. Again, she moves the part onto the next station and pulls a new piece. We’re on a roll now!

Operator 3 (Green) now has the first piece. There are a total of 3 pieces that are WIP and 7 that have yet to be touched. But, once this step is completed they will have completed their first finished good in 3 minutes! Also, they will now churn out a finished good every 60 seconds because there is a continuous flow. After just 12 minutes, the second line has finished their batch of 10 parts.

See the difference? If this wasn’t clear enough, check out this animation.

Now that you know what you (might) be missing out on, we’ll show you how to set up your workstations for one-piece flow.


How To Achieve Continuous Flow

Yes, the one-piece flow has many advantages. Yet, to implement this process you need to meet certain requirements. Without these requirements, the one-piece flow will be near impossible to achieve. 

Here are those requirements:

  • Maintain 100% machine uptime (or as close to 100% as possible).
  • Work, resources, and time must be divided evenly amongst workstations.
  • Work-in-process (WIP) must be limited to one item in any station’s queue.
  • Time to complete a task must be measurable and repeatable.
  • Time to make one-piece must be scalable to customer demands (takt time).
  • The quality of resources must be consistent. Inconsistent quality equals poor defect rate.
  • The operation must be able to consistently produce good results.

Variation is the enemy of continuous flow. To achieve an efficient flow, you have to cut variation from the process. If these conditions above aren’t met, then ultimately you will not achieve a one-piece flow down your value stream. After all, it is possible that your product is not suitable for one-piece flow.

But if you do have what it takes to kick the variation bug, then here are the 6-steps to creating your own continuous flow workstations


6 Steps For Creating Continuous Flow Workstations


Step 1: Design a connected flow

A connected flow involves linking each process step within a value stream. In other words, you can establish an underlying relationship between each processing step in a connected flow. Each manufacturing step is either directly related, or related by a pull system like FIFO. Ultimately, the goal of this relationship is to move the product from step to step with little to zero waiting time.


Step 2: Determine whether the workstation is product-focused or mixed

Basically, the difference between product-focused and mixed is the number of products that occupy that workstation. For instance, if the workstation focuses on one product then you can focus on that process. However, the demand for this product must be high enough to maintain a continuous flow.

If there is a mix of products that need assembly at this workstation, then the rules change a bit. For example, if the workstation has to accommodate product A one hour and product B the next, you’ll need to use a mixed station. With a mixed station, the goal is to minimize changeover time. Changeover time is the time between the last good product run and the first good product of the new run. As a general rule, changeover time must be less than one takt time.


Step 3: Calculate Takt Time

Takt time– a measurement of customer demand expressed in units of time. Takt time allows you to keep a pulse on your customers’ demands without under or over-producing products. This is another concept of lean manufacturing and just-in-time where the customer only receives a product when they ask for one. Ultimately, this drives production and inventory costs down. 

To calculate takt time use the following formula:

Takt time= Available work-time per shift / Customer demand per shift


Step 4: Determine the processes and time required for making one piece

Step 4 involves conducting an extensive time study on each of the individual processes within the whole operation. First, you need to identify each step in the assembly process from start to finish. Then, you will want to follow a single product through the process from start to finish. Record the time it takes to complete each step as you move through the process. Once you finish, go back through and time each step repeatedly. From this data, take the lowest repeatable timestamp and use it as your baseline going forward.

Can your recorded times match up to meet takt time? If not, you may need to reevaluate your processes and/or equipment.

Linkable content – How to conduct a time-study.

Step 5: Create a lean layout using elements of 5-S 

Creating a lean layout is a difficult, but necessary activity. The goal at this stage is to limit wasted movements within the work cell. For example, placing equipment and material at the point of use is a great way to cut wasted movement. On the other hand, if the operator must turn around every 5 seconds to grab a tool then they are wasting movements. In short, wasted movement slows down the line which creates more WIP- a cardinal sin in this discipline. 

Another great way to cut waste is through the workstation’s design. The most common design, and perhaps the best, is the U-shaped workstation. This gives an operator full access to resources with limited movements. Yet, there are some instances where a U-shape is not possible due to space constraints. You can experiment with other shapes to find out the best for your situation.

Linkable content: Case Study- Why the popular video game Overcooked is a perfect example of bad cell design.

Linkable content: What is the 5-S methodology


Step 6: Balance the workstation and create standardized work instructions.

The last step is to balance the workstation and deploy a standardized process for splitting up the work time. For example,  our earlier segment showed a 3-step setup with each step requiring 60 seconds of work-time. The entire process takes 3 minutes to complete, which can be split up between 3 operators for balance. If we added an operator, then we would split the time amongst the 4 – equalling 45 seconds each. Similarly, we can subtract an operator and split the 3 minutes in half, 90 seconds each.

Again, the way to balance the cells depends on the number of steps and how much time each step needs. There is a formula that tells you how many operators you’ll need to be successful. That formula is shown below:


Number of operators = Total work content/ Takt time


Ex: 720 seconds / (28800 seconds in a shift / 100 parts per shift demanded)= 2.5 operators


Oops! We have half an operator leftover! This is called an inconvenient remainder. With these remaining operators, it is difficult to balance the assembly line. You can reallocate these operators/ activities to resource management to balance the line. Or, you can reevaluate your value stream to make it more efficient. To do this you need to cut steps out of the operation or reduce the time needed to complete the longer steps.

In conclusion, one-piece flow is one of many ways to optimize an operation. Most of the time, continuous flow is achievable with one, if not all value streams. But, that is if you have the right resources. If not, then it is important to continuously improve processes to try and achieve this flow. Ultimately, this is the way manufacturers can increase output, reduce costs, and keep customers stocked. If you don’t have the resources, for whatever reason, then working with a contract manufacturer would be the best course of action.


iStock-963371656-1280x853.jpg

April 27, 2021by Chase Bodor

Since its invention in the ’60s, the copy and paste function has been a vital time-saving business tool.  With this tool, businesses eliminated repetitive work that was already done before. In other words, they didn’t need to reinvent the wheel again and again. What better time-saving shortcut is there for a business? Well…

What if I told you that there is another version of copy and paste. This version actually doesn’t make life any easier for your business, or yourself. In fact, this version of copy and paste steals the very idea or product that has taken you months, even years to build. And unlike on a computer, there is no undoing it. All your hard work is copied and pasted in an instant for someone else’s profit.

This is the danger of IP theft in outsourced manufacturing.

As we go further into this topic, we will discuss how IP theft happens in the big picture. First, we will talk about the different agents involved in stealing business IP. This is also known as industrial espionage. Then we will cover the ecosystem of outsourced manufacturing. White label manufacturing plays a big role in IP theft and is worth studying in this context. Following this section, we will look at some basic principles of protecting your company’s IP. Finally, we will talk about why trustworthy relationships go a long way towards protecting your IP. This includes a conversation between myself and a product design firm.


What is IP theft

According to the FBI (who I believe is credible for this topic), IP theft is stealing peoples’ and/or companies’ ideas, inventions, and creative expressions. These are intellectual properties- which include trade secrets, proprietary products, and media engagements. 

There are four main types of IP:

  1. Trade secrets
  2. Trademarks
  3. Copyrights
  4. Patents

IP theft is becoming a more prevalent issue as digital technologies and Internet file-sharing networks integrate into major business operations. For example, sensitive information transferred over the web is a prime target for internet hackers. We will discuss the different scenarios in which IP theft occurs later in this segment.

In general, IP theft happens more where trademark laws are less defined and harder to enforce. For example, overseas companies are major offenders of  US-based IP theft. In fact, Chinese theft of American IP costs the US between $225 billion and $600 billion annually. These numbers are from an investigation led by the United States Trade Representative. Additionally, those numbers match with a 2017 report from the Commission on the Theft of American Intellectual Property. As you can see, IP theft can result in serious economic damage and can stun business growth.


How does Ip theft occur?

There are many opportunities for thieves to steal intellectual properties. For instance, internal and external data mining can reveal lots of sensitive information. In other words, protecting your IP is not as simple as locking your front door and buying an SSL certificate for your website. We will discuss some best practices for protecting your IP later on. For now, let’s jump into who engages in industrial espionage and how they extract information.


The common IP thief

The internal agent: Someone who steals/ reveals their company’s IP from the inside. This person is someone who joins a company with the sole intent of spying to gain information. In other words, they were working for someone else all along. These internal agents can release sensitive data about your company. They can also hinder its competitive edge by taking proprietary tools. 

A disgruntled employee is another common IP perpetrator. This person takes revenge on his or her company for their perceived wrongdoing. They can also talk their peers into sabotaging the company from the inside if they’re persuasive enough. As a result, you may have many internal seeds working to compromise the company.

An expert moving within an industry is also a threat to intellectual property theft. Although less common due to non-compete agreements; someone can move companies within an industry and take some of the IP with them. Although this isn’t illegal in some cases, there are moral implications with this behavior.

And finally, there is always a potential for inside information to accidentally leak out. This happens when someone from inside the company sends information across unsecured channels. Or to the wrong recipient entirely. 

External Agents: Someone who infiltrates your company’s data through hacking or other forms of unsolicited collection. People who work in an office setting will come across many attempts to steal information. The most known methods: phishing, hacking, etc, are disguised well to imitate a familiar transaction. In fact, these information heists mimic high-profile people within a company. They will ask the receiver to send sensitive information with urgency. If successful, these attempts are devastating. And the recovery from such an event can take years if they recover at all. This is why having protected channels to send information is so important.


Common IP theft scenarios

Let us review some common scenarios where IP theft can occur:

  • Internal Agents
  • Leveraging privileged access 
  • Spys/ investigators
  • Disgruntled and persuasive employees 
  • Accidental information leak
  • External Agents
  • Hacking/ phishing
  • Surveillance
  • Data mining (including paper trails)
  • Security breach


How does IP theft affect me?

For those who are still reading and think “oh this will never happen to me or my business” think again. Many small and medium-sized businesses are targets of scammers, hackers, and IP perpetrators. And your company’s books aren’t the only thing they’re after. They are after anything they can pull from you and use for their own gain. If your company owns IP or holds customers’ IP, think what can happen if those “secrets” are in the hands of someone who can re-engineer it for themselves. 

Let’s look at this from the lens of a manufacturer– a business that manufactures goods for sale either for themselves or for other companies.


How is outsourced manufacturing involved?

Manufacturing plays a significant role in IP theft. As hinted earlier, a manufacturer holds an entire portfolio of IPs.  And holding these different properties gives the manufacturer a ton of responsibility. This responsibility isn’t always held close with a moral compass either. You will find some manufacturers steal ideas, products, and technologies from their clientele. They then reintroduce those products into the market under a different brand. 

In this next section, we will discuss what role outsourced manufacturing plays in IP theft. Also, we will discuss two manufacturing methods: White Label and Contract Manufacturing. While the two share some similarities, they both pose some risk to a company’s IP.  Furthermore, we will explore what a Copycat Manufacturer is and its role in IP theft. In the end, we will transition into some helpful ways to protect your IP.


White Label Manufacturing vs Contract Manufacturing

What is ‘white label’ manufacturing

White label manufacturing is a popular option for outsourcing manufacturing. In this process, a retailer or brand hires a manufacturer that produces a product they want to sell. The retailer purchases the product and slaps its label onto it. The idea behind this is a well-recognized label can make it look like it produces its own product line. When in reality they buy their product at wholesale prices from a manufacturer. To summarize, a white label manufacturer makes its own products but makes them available for sale to retailers. At the same time, the manufacturer can use its own sales channels to sell that product to other retailers or consumers.


what are the differences between white label and contract manufacturing?

A contract manufacturer is different from white label manufacturers in a few ways. For example, companies hire contract manufacturers to produce parts, components, or final products. The hiring firm first establishes the design specifications that the manufacturer must follow. Then the manufacturer orders the necessary consumables and runs its processes. Based on the agreed terms, the manufacturer produces a set number of parts over a specific timeframe. Once the manufacturer fulfills the order, the parts get shipped back to the hiring firm. At no point does the manufacturer sell these parts under their own, or any other label. In fact, both parties enter into a contractual agreement that protects their interests. This agreement involves sharing intellectual properties, designs, processes, and more. To learn more click the links here on contract manufacturing and NDA’s.

If you didn’t pick up on it, I will tell you the big difference between the two types. The big difference between contract manufacturers and white label manufacturers are:

  1. White label manufacturers can make and sell products as their own.
  2. Contract manufacturers make parts exclusively for another business.

Although this doesn’t seem like a huge revelation, there are a ton of implications. For one, the white label manufacturer can take a “new” product to market with little effort. 

Remember what I said about the moral compass?  Well… 

There are examples of overseas manufacturers that take someone else’s product to market. To put it in different terms, these manufacturers rip off an idea and sell it as their own. Whether IP is explicitly stolen, or they create off-brand products meant to mimic a large national brand; this process breeds something called Copycat Manufacturing.


Copycat manufacturers

A copycat manufacturer takes a product or idea and spins it to make it look like their own.  They even will clearly rip off the existing product label to trick consumers into buying their product.  For example, a copycat will keep the same branding as well-recognized products. This is so consumers will think highly of the product and choose it based on the discount price.

A great example here shows the many knockoff variations of Dr.Pepper.

Copycats are a huge problem in the manufacturing space. These manufacturers not only copy well-performing products, but they hurt the value of the existing products. 

Not only that, there is a huge negative impact on the US and global economy. The International Chamber of Commerce estimates that counterfeit products and stolen IP will negate a total of 4.2 trillion US dollars from the global economy by 2022.

To bring the point back around, not all white-label manufacturers steal IP and create their own product offerings. But, the ones that do are playing a huge role in this micro-chasm of stolen IP-turned rip-off products. This is the risk you run by not protecting your intellectual properties. And also by working with an unvetted manufacturing partner.

Now you understand the risks of unprotected IP. Next, let’s look at some ways you can stay vigilant and protect your business.


Managing the Risks of Outsourced Manufacturing

IP Security Screen

Is my IP at risk if I outsource manufacturing?

The short answer: yes.

But the risk of getting duped by a manufacturer you know and trust is quite low. The arrangement between producers and sellers is a time-tested affair that has worked for most businesses. The key to this relationship has been, and always will be, trust. 

While working with a circle of manufacturers you trust is important, you should still protect your IP. If someone steals your business’s IP, it is very hard to find and prosecute the thieves involved. And there is no telling how long it will take to recover your IP.

In this next section, we will cover some helpful tips for keeping your IP safe.


How do I protect my business from IP theft?

To keep your business IP safe follow these six principles suggested by Awake Security:

  • Identify Your IP
    • Identify exactly what information you want to protect and from whom to protect it. Through this exercise, you can align your leadership group with your security goals.
  • Locate Your IP
    • Without locating where your IP sits (IT systems, file cabinet, you name it) you won’t know how to protect it. Because we’re looking at this in the context of manufacturing, you will want to audit your third-party systems as well. This includes ERP systems, product catalogs, technology stacks, and more.
  • Conduct a Risk and Cost-Benefit Analysis
    • Do you know how much it would cost you if you were to lose your high-profile assets? Do you have a priority list when it comes to IP? If not, this exercise will help you identify which assets will cause the most harm if they were lost. Also, this will help you identify where to invest in security systems to prevent a large loss.
  • Educate Employees
    • Help the people in your organization understand what IP is at risk of exposure. By educating your team they can better protect and prevent IP breaches from happening.
  • Identify Protection Gaps
    • There are many opportunities for a thief to attack your business. Auditing your systems by thinking from an attacker’s point of view is an excellent way to identify any gaps in your current system. Once you’ve identified some areas for improvement put on your thinking cap! Start with small adjustments and aim for continuous improvements. Also, consider making investments in your security to boost your protection.


What to Consider for Your Manufacturing Partnership

Choosing the right partner is time-consuming and has an incredible impact on your company’s success. But, not all manufacturers are created equal. That’s why vetting your potential partner is an essential step before doing business.

Before you put pen to paper- consider looking into your potential partner using these criteria:

  • Location:
    • The location of your supplier is a huge consideration when you factor in time-to-delivery and responsiveness. Working with an offshore manufacturer might cost less upfront. However, I’m biased to working with domestic partners for several reasons. For one, you have more visibility into your supply chain. Second, you can communicate in your own language. This is key when situations arise that can be problematic. Choose the location of your next supplier wisely.
  • Capabilities and Experience:
    • Would you choose the world’s best Sous Chef to cater for your company party? Maybe, but they probably aren’t the best choice. Choose a supplier who has an ample amount of experience working in your field. This will make the process seamless and your communication clear cut. They’ve worked with companies like yours before so they know the challenges you face.
  • Check references:
    • This and the item above go hand-in-hand. Check references with other companies who are also supplied by the same manufacturer. Most of the time, these companies will have a scorecard, approved supplier list, or at least some nice words to say.
  • Labor Practices:
    • Again, working domestically helps mitigate some best labor practice issues. Evaluating the working environment of your supplier will give you some insight into the culture of the company. Also, this will help you understand how they treat people inside and outside the company. Red flags? This is a sign that you might run into issues down the road.

To wrap this up, we would love to start a conversation about a potential partnership. If you’re looking for an experienced injection molder based in the US, then look no further than here! With over 40 years of experience, we’ve helped many companies with their projects. Plus, we keep a tight ship over here. So you can trust us with your intellectual properties. Give us a call and see how we can address your molding challenges!


March 31, 2021by Chase Bodor
Now that’s a Big Ass Fan!
 
We’re happy to announce the installation of our new fans ahead of the summer months. If you have ever been to Southern California in the summer then you’ll understand why we’re so excited.
 
We started this project in the winter knowing we should get a head start on the hot days ahead. Even with temperatures in the mid-80’s the warehouse is beginning to feel stuffy. Could you imagine what it would be like when it’s 110-120 degrees?! And the warehouse is even hotter.
 
There were tons of reasons why we wanted to install fans in our building. In previous years, it was a challenge to keep our staff cool and hydrated. While we did have smaller fans that helped, the environment was still uncomfortable. Not only that, but it is dangerous to work in those conditions- not by anyone’s fault. It was time to do something that would make a big difference.
 
But this year is a different situation altogether. Yes, we expect there to be heatwaves, high temperatures, A/C issues, and everything else you expect in a California summer. What we didn’t expect is the lasting impact that Covid-19 would have on operations. With all the safety measures in place to operate ‘normally’, there had to be more we can do to host a safe workplace.
 
The solution- Big Ass Fans! BAF combined some sort of ion technology, that kills bacteria and viruses, with their big fans. With these fans we could tackle two challenges: We can host a safer and cooler workspace.
 
As we turn these bad boys on and let them run, we’re excited to see the difference they make.


October 31, 2019by rpothier
SOLUTIONS THROUGH COLLABORATION
Plastics Plus Technology, Inc hosts Polyone

PPT works very closely with our suppliers to improve materials, processes or to solve problems. -Richard Pothier


Engineers from Polyone (pictured)  were out to evaluate new material formulations which may help to reduce cycle times.   In this particular case, Polyone delivered several special formulations for PPT to evaluate in a particular tool.  Our molding manager setup and run each of the materials and sampled them according to our project plan.   Samples were evaluated by our quality department and feed back was given instantaneously.  Since Polyone engineering was in house to see the test, they could determine what tweaks may be required to the chemistry to improve the formulation.

This is type of activity quite common here at PPT throughout the year.  This year, we have worked closely with companies like Polyone, Star, Teknor Apex, RTP, on process and formulation.   All of this is in an effort to achieve continual improvement over various aspects of our business.

This year alone PPT has brought suppliers in to improve equipment, materials, streamline processes and inspection, integrate robotics and find better packaging solutions.  We work closely with our suppliers and we utilize their expertise wherever possible to help improve our supply chain and make our company more competitive.


PICTURED BELOW

Left to Right: John Scoarste(Polyone), Spencer Morris(Polyone), Jose Avalleneda(PPT), Luis Gonzales(Polyone), Richard Pothier (PPT)


October 31, 2019by Chase Bodor

Plastics Plus Technology had been working with the Inland Empire United Way to help make the community better.   You may remember in our last newsletter that we packed lunches for needy school children in the area.   The United way has another program which supplies students and teachers with many school supplies which may be un-affordable for lower income schools or families. Their facility is equipped with a “store” complete with isles full of pencils, papers, and any other school supplies you can think of.   Students and teachers come buy and pick up supplies at no cost as they need them.

We were looking for ways in which PPT may be able to support this effort and decided that we can donate pencil boxes.  PPT owns several molds that can produce various sizes of plastic boxes.   To keep costs down we manufactured the boxes from regrind scrap material left over from other parts  Normally this material would be sent to a material recycler, however in this case it was given new life as a pencil box for needy children in the area.

The boxes were a success and the united way was very happy to receive the donation.   PPT was happy to have an opportunity to help and to give new life to material that would have otherwise been scrapped.


January 9, 2019by rpothier

Overmolding is the process of injection molding a component using two different materials. Typically a rigid material is overmolded with a soft thermoplastic elastomer(TPE). There are many different reasons why you may choose to overmold, these reasons include: styling, weatherproofing or ergonomics. There is no doubt that you have seen parts that have been produced in this manner. Your toothbrush is a perfect example as most tooth brushes are manufactured from a rigid polypropylene material and have softer TPE grips that are overmolded. TPE overmolds can be essential for critical applications where you need a non-slip grip or better control and tactile feel.

Other types of overmolding include insert molding.  A screwdriver is a great example of an insert mold.   The steel screwdriver is inserted into the mold and plastic is overmolded onto the steel creating a handle.   In some cases the handles can be molded with several different materials to create a different look or feel.

Product Design Considerations
As with any injection molded product, Good product design is essential to reduce cost and improve the quality of the end product.

  1. Wall thickness is important, a thick wall increases the cycle time and a thin wall can make your part feel flimsy.
  2. Gradually transition from thick to thin sections to improve flow.
  3. a wall thickness of .060″ to .120″ is typical for an overmolded TPE and will help to ensure that the overmold bonds to the substrate
  4. Keep the wall thickness of the substrate and the overmold uniform, Core thick sections to reduce the chance of sinks or voids
  5. Add a radius to Sharp corners to reduce stress in the molded part.
  6. The TPE overmold should be less than or equal to the thickness of the substrate to prevent warp
  7. Consider texturing the soft TPE, this reduces tendency to stick in the mold and can improve feel
  8. Consider material selection, Some materials will bond together when overmolded. Other materials will require feature to mechanically fix the overmolded TPE to the substrate.  These features can include undercuts or mechanical interlocks.

Material Considerations
You can overmold TPE over a variety of different materials.  TPEs can be formulated to bond to different materials so it is important to work with the material supplier to select the most appropriate material for your application.  Here is a short list of some of the materials commonly used as the base substrate in overmolded components:

  1. Polycarbonate (PC)
  2. ABS
  3. PC/ABS
  4. Nylons
  5. Polystyrene
  6. High impact Polystyrened
  7. Acetal
  8. PPO
  9. Polypropylene

Tooling Design Considerations
The tooling design will be heavily dependent on your estimated annual volumes and target pricing.   For very high volume parts with a low target cost, we would select tooling capable of running fully automatic.  This would require specialized molding machines with multiple barrels capable of shooting more than one material at a time.  The tooling is specialized and designed to fit a particular machine.  These types of molds can be very expensive.

For lower volume parts, an operator or robot can manually place the substrate into the tooling and overmold the soft material.  This process will require two tools, one to produce the substrate and another to produce the overmold.   This can be done in a typical molding machine using a single barrel but would require multiple setups and a full time operator.  The cost is higher but this is a better option for lower volume parts.


August 13, 2018by Chase Bodor

Plastics Plus was delighted to welcome Rudy Murillo to the team this summer as an Intern Engineer. Rudy, a local Californian, is pursuing his degree in manufacturing engineering at Arizona State University: Polytechnic Campus in Mesa, AZ. In his education, Rudy worked on various projects that required programming, machining, design, concept development and everything in between. This summer he was able to apply his knowledge and work directly with our project managers in developing automated tools to expand the company’s capabilities. Rudy was able to bring fresh ideas to the table, gain valuable insight into the world of manufacturing and help take Plastics Plus a step forward. He will be returning to Arizona this week to finish school and start his new position. We wish Rudy all the best in his upcoming graduation, his new position, and future endeavors.

As he leaves for Arizona, Rudy was able to give his final reflection on his experience:


What was your first exposure to manufacturing/ engineering?

My first exposure to engineering was during my visit to the Naval Academy where engineering (in several disciplines) is the main degree offered by the University. During the week, we observed many examples and acts of science (mainly physics) in the study halls where the Midshipman(students) attended their classes. 

What fascinates you about M&E?

The idea that everything is made, whether it is on a small or large scale; and the method that is used to create a product can determine the overall success of a company. Manufacturing is always changing and evolving so rapidly that the idea of full-scale automation does not seem like a far-fetched concept. To be part of a generation that will be working closely with new technology is exciting, especially to experience the power available to us first-hand thanks to such technology.


Pictured: Rudy working hard in the tool room on his project.


What was it like working at Plastics Plus? 

My experience at PPT was awesome! Seeing and interacting with some of the various machines was different and insightful on how some operations are run. I was forced to think outside of the box and find possible solutions for abstract movements and processes.

What useful skills have you learned as an intern here?

I worked a lot with SolidWorks, which is crucial because manufacturing involves a lot of modeling and programming. That process is vital to making a viable tool capable of manufacturing quality parts. I also had the opportunity to work hands-on with a milling machine and learned different methods of setting up and making good cuts in aluminum.

What are your goals following graduation? 

The biggest goal I have after graduation is to put myself out of my comfort zone wherever I go. I hope to learn new skills that will follow me for the rest of my life and have opportunities that I would never have before.

Looking back, what are some of the highlights of your experience?

Overall, the internship was a great learning experience and I have learned quite a bit of information because of the mistakes that I made. I definitely know that I underestimated the time to machine the final box for the pressing machine in the hopes that I had enough time to finish it. I will definitely take the lessons and skills that I have learned at PPT and take them with me on my future endeavors wherever they may take me.


Thanks for coming aboard with us this summer Rudy, and good luck!


August 7, 2018by rpothier

Preface:

The packaging industry is currently on blast, meaning, there are hundreds if not thousands of reports on how single-use and nonrecyclable packaging is devastating some of the most beautiful places on the planet. There have been disturbing videos of trash, debris, and indecomposable plastics washing up on shore in waves, literally. Single-use plastics are no doubt the culprit; often dumped into the ocean, river and washed down by rainstorms that result in huge environmentally impactful phenomenon like the Great Pacific Garbage Patch, Beirut’s River of Garbage (Lebanon), La Pasion River crisis and the Dominican Republic beach full of trash.

Solutions:

While many city, state and federal governments have established prohibitions on single-use plastics, that will likely not be enough to reduce the impact that has already been done. In fact, there may not be a reasonable solution for years to come. However, companies who rely on plastics do have options for reducing their impact on the environment moving forward. A company who wants to be more environmentally responsible can do so in a variety of different ways:

  1. Reduce/ eradicate single-use plastics altogether.
  2. Use biodegradable plastic material for parts that will decompose.
  3. Make the product easy to recycle.
  4. Use environmentally friendly packaging solutions.


Eco-friendly Packaging Solutions

Single-use packaging (grocery store bags, meat packaging, plastic wrapping, etc.) is one of the biggest contributors to the environmental crisis. The plastic is bad for the ecosystem, the animals that live there and will be bad for humans too! We are not immune to the chemicals that plastic can release once it is broken down by sea water; it can even end up in the food we eat like fish!

The best thing to do as a company going forward is finding solutions for packaging that can reduce the impact your product makes on the environment. Surprisingly, there are a lot of options and the list is growing as we progress with technology and awareness. Even if your company is committed to using plastic packaging, there are ways to make that packaging less or completely impactful on the environment. These changes can be costly or cost-effective, but either way, the environment will be the ultimate beneficiary of the move. However, your company can benefit too! There are plenty of branding opportunities with biodegradable plastics, and often consumers will look to see if you’re being environmentally responsible. Now more than ever!

If you want some examples of creative ideas for sustainable packaging, check out this blog post.

Authors note: My favorite packaging solution story is that of Saltwater Brewery’s Eco-Six Pack Rings. These rings are a really great solution to the disparaged plastic-ringed six packs.

Scroll to the bottom to see how our company has helped with our customer’s products and packaging.

Biodegradable vs Compostable

While these two terms seem interchangeable, they are far from that. There are some key differences between biodegradable plastics and compostable plastics; each with their own set of properties and criteria.

Compostable Plastic is plastic which is “capable of undergoing biological decomposition in a compost site as part of an available program, such that the plastic is not visually distinguishable and breaks down to carbon dioxide, water, inorganic compounds, and biomass, at a rate consistent with known compostable materials (e.g. cellulose). and leaves no toxic residue.”  American Society for Testing & Materials (ASTM).

In order for a plastic to be deemed compostable, it must meet three specific requirements:

  1. Biodegrade- Must break down into water, CO2 or biomass at the same rate as paper.
  2. Disintegrate- The material is not distinguishable in the compost.
  3. Eco-toxicity- Does not produce toxic material and can support plant growth.

Biodegradable Plastic is plastic which will degrade from the action of naturally occurring microorganism, such as bacteria,  fungi etc. over a period of time.  Note, that there is no requirement for leaving “no toxic residue“, and as well as no requirement for the time it needs to take to biodegrade.

How Plastics Plus Technology has Helped its Customers Find More Sustainable Solutions:

For some of our customers, we offer biodegradable low-density polyethylene bags (ECLE).
These bags contain an additive that helps the material breakdown without compromising specs
like:

Shelf-life
Strength
Clarity
Printability

The biodegradable bags break down when in contact with other biodegradable substances found in landfills, home, and garden compost. The bags are offered in different colors, thicknesses and can be run on automated packaging systems. For more info on the bags itself, visit our supplier www.autobag.com.

Although not the only way, biodegradable packaging is one way to leave the planet less impacted by consumers. Like anything else, these bags and other sustainable packaging systems have to be disposed of properly to have the desired effect on the environment.


  • Menu
  • About Us
  • Social Media
  • Contact Us
Menu

Under construction. Check back later

About Us

Plastics Plus Technology is a woman-owned, USA contract manufacturer based in sunny Southern California. Our custom injection molding and value-added services can provide you with a one-stop job shop for all your plastic manufacturing needs.

ISO 9001:2015, ISO 13485:2016 QMS certified and compliant. FDA compliant. Good Manufacturing Practices (GMPs). WBENC.

Social Media
Contact Us
Phone EmailContact Form